Glass Process
Glass Casting
The Refractory Mold
A refractory mold is a mold made from materials that can withstand very high temperatures. This mold is usually a one time use mold, because the materials making up the mold become fragile when returning back to room temperature. Often, the molds used to cast glass are made using the lost wax casting technique. Lost wax casting is used in many mediums besides glass, like cast metal work, for example. For this technique you sculpt or cast something in wax and create a one part refractory mold around the wax object. After this the wax is then melted out (usually using steam) and you are left with a hole in your mold that is the shape of your wax. But these molds are not quite ready to put in the kiln, it takes several days in a warm area to dry out a mold, never put a wet mold in the kiln (unless it is cracked and it is on a dry out cycle).
For this particular project I have created a mold to speed up the process of making refractory molds. Usually refractory molds are made by building up refractory in many layers. Here, I am making a mold to cast my glass vertebrae. I repeated this process 150 times to create the series ‘Stress’.
Loading the Kiln
Loading the kiln may seem like a simple task, but there are several key details that could easily make or break your casting, or even worse, your kiln! The first thing I do almost every time I load a kiln is put sand on the shelves to prevent my glass from ruining your shelves and flowing into your kiln elements. I then place bricks that will prop up my molds, bringing your molds off the kiln floor allows heat to evenly penetrate your mold. The more even the temperature in your mold, the better your cast. Now it’s time to load your refractory molds. Once the molds are loaded, it is finally time to add glass. The glass needs to be cleaned and weighed out (there is a complicated formula for this), then placed carefully in the mold. Programming the firing schedule is the last step and potentially the most complicated part about loading the kiln. If you know your firing schedule, this step isn’t too hard, but when you are casting a new object or using a new kind of glass, creating a kiln schedule can be difficult.
Creating the firing schedule for the vertebrae took me more than 5 firings and a lot of research. All the glass used to create my spines is recycled factory glass. Factory glass is notoriously hard to cast. Part of my Master’s research asks and seeks to answer the question ‘What makes glass castable or not?’. In this study, I tested several kinds of glasses and created many kiln schedules to understand what glasses are best for casting, and how to create the best kiln schedule for specific types of glass.
Divesting the Mold
This is where things get exciting! Divesting, or opening molds is my favorite part of the casting process. This is when you find out if all of your hard work was worth it. The feeling of seeing your object in glass for the first time is like opening presents on christmas morning, and inside is something better than what you could have ever wanted! Unless your casting didn’t work… then it’s like getting coal, but way better because it’s this uniquely shaped glass piece of coal that may inspire you to make something completely different.
When you first open the kiln it’s very exciting, but you have to be patient. The outside of your molds may be cool enough to touch, but the inside is still slowly cooling down. I try to wait at least 12 hours after my kiln is at room temperature to divest my molds. When it is time to open your molds, you need to wear gloves (which I am not doing…) and a respirator. The dust caused from the fired refractory mold is not healthy to breathe and there could be sharp glass in the mold. After the molds are open, they will still have a thin layer of refractory on them. This needs to be washed off with water. However, especially with thick glass pieces, you still need to wait for the center of the glass to hit room temperature, which means waiting another 12 hours (more or less depending on the thickness of your piece). I often use an old toothbrush with water to scrub the leftover refractory off the piece.
Cold Working
Cold working is the act of grinding or polishing glass. In order to grind or polish glass you need to have a constant flow of cold water hitting your glass or grinding surface, this is where the term ‘cold working’ comes from. Glass is extremely sensitive to heat, so a fast change in temperature can cause the glass to crack. When you are grinding glass, it creates friction between the grinding surface, and your glass, causing it to heat up quickly. The constant flow of cold water prevents the glass from heating up. There are many cold working tools in different shapes and sizes to allow you to grind different surfaces and shapes into your piece. All of these tools are embedded with diamonds. Diamonds are one of the only materials hard enough to scratch glass. The diamond embedded surfaces come in a range of different grits, like sandpaper. You do most of your shaping with the lowest grit number (like 80 which is a really rough surface) and then to polish you continue to use more fine grit sizes until you hit 600 or 800. If you want a full polish you end with a cork surface. This process takes a very long time and requires a lot of patience, which I don’t have much of, so I would have to say the cold shop is one of my least favorite places to be in the glass studio. But some people really love it and make all of their work solely in the cold shop.
Blowing Glass
When you think of glass work, more than likely, the first and maybe the only thing you think of is glass blowing. Watching glass blowing is like going to a show, and I often refer to it as a sport. It is very hard to describe what it’s like to blow glass; It’s a dance performed in a sauna, while balancing molten lava on the end of a metal rod. But, when you are a practiced glass blower, it doesn’t feel that complicated or dangerous. After many years of practice it becomes therapeutic.
To start most blown glass pieces you need to pick up your glass. The molten glass sits in the furnace at around 2400ºF (1300ºC) so, obviously, no touching. Instead you gather glass on the end of a pre heated stainless steel rod, some of these rods are solid and some have a hole through the middle. Once the glass is on the end of your rod, you need to be constantly spinning the rod, so the glass does not drip off the end. Once the glass leaves the furnace it cools down rapidly, and as it cools, it hardens. Before the glass stops moving, you need to stop what you are doing and reheat it in the reheating chamber (also called the glory hole). As your cold tools touch the surface, your glass cools. If you need to shape it with a water soaked wooden tool, your glass cools. The glass needs to be continuously reheated to bring it up to a working temperature. But be careful! If you heat it too much you may undo all of the work you just did.
Once your piece is complete it is put in an oven set at a safe temperature (hot enough that the glass won’t crack, and cool enough that the glass won’t melt) and then cooled down slowly over the course of 12 or more hours.
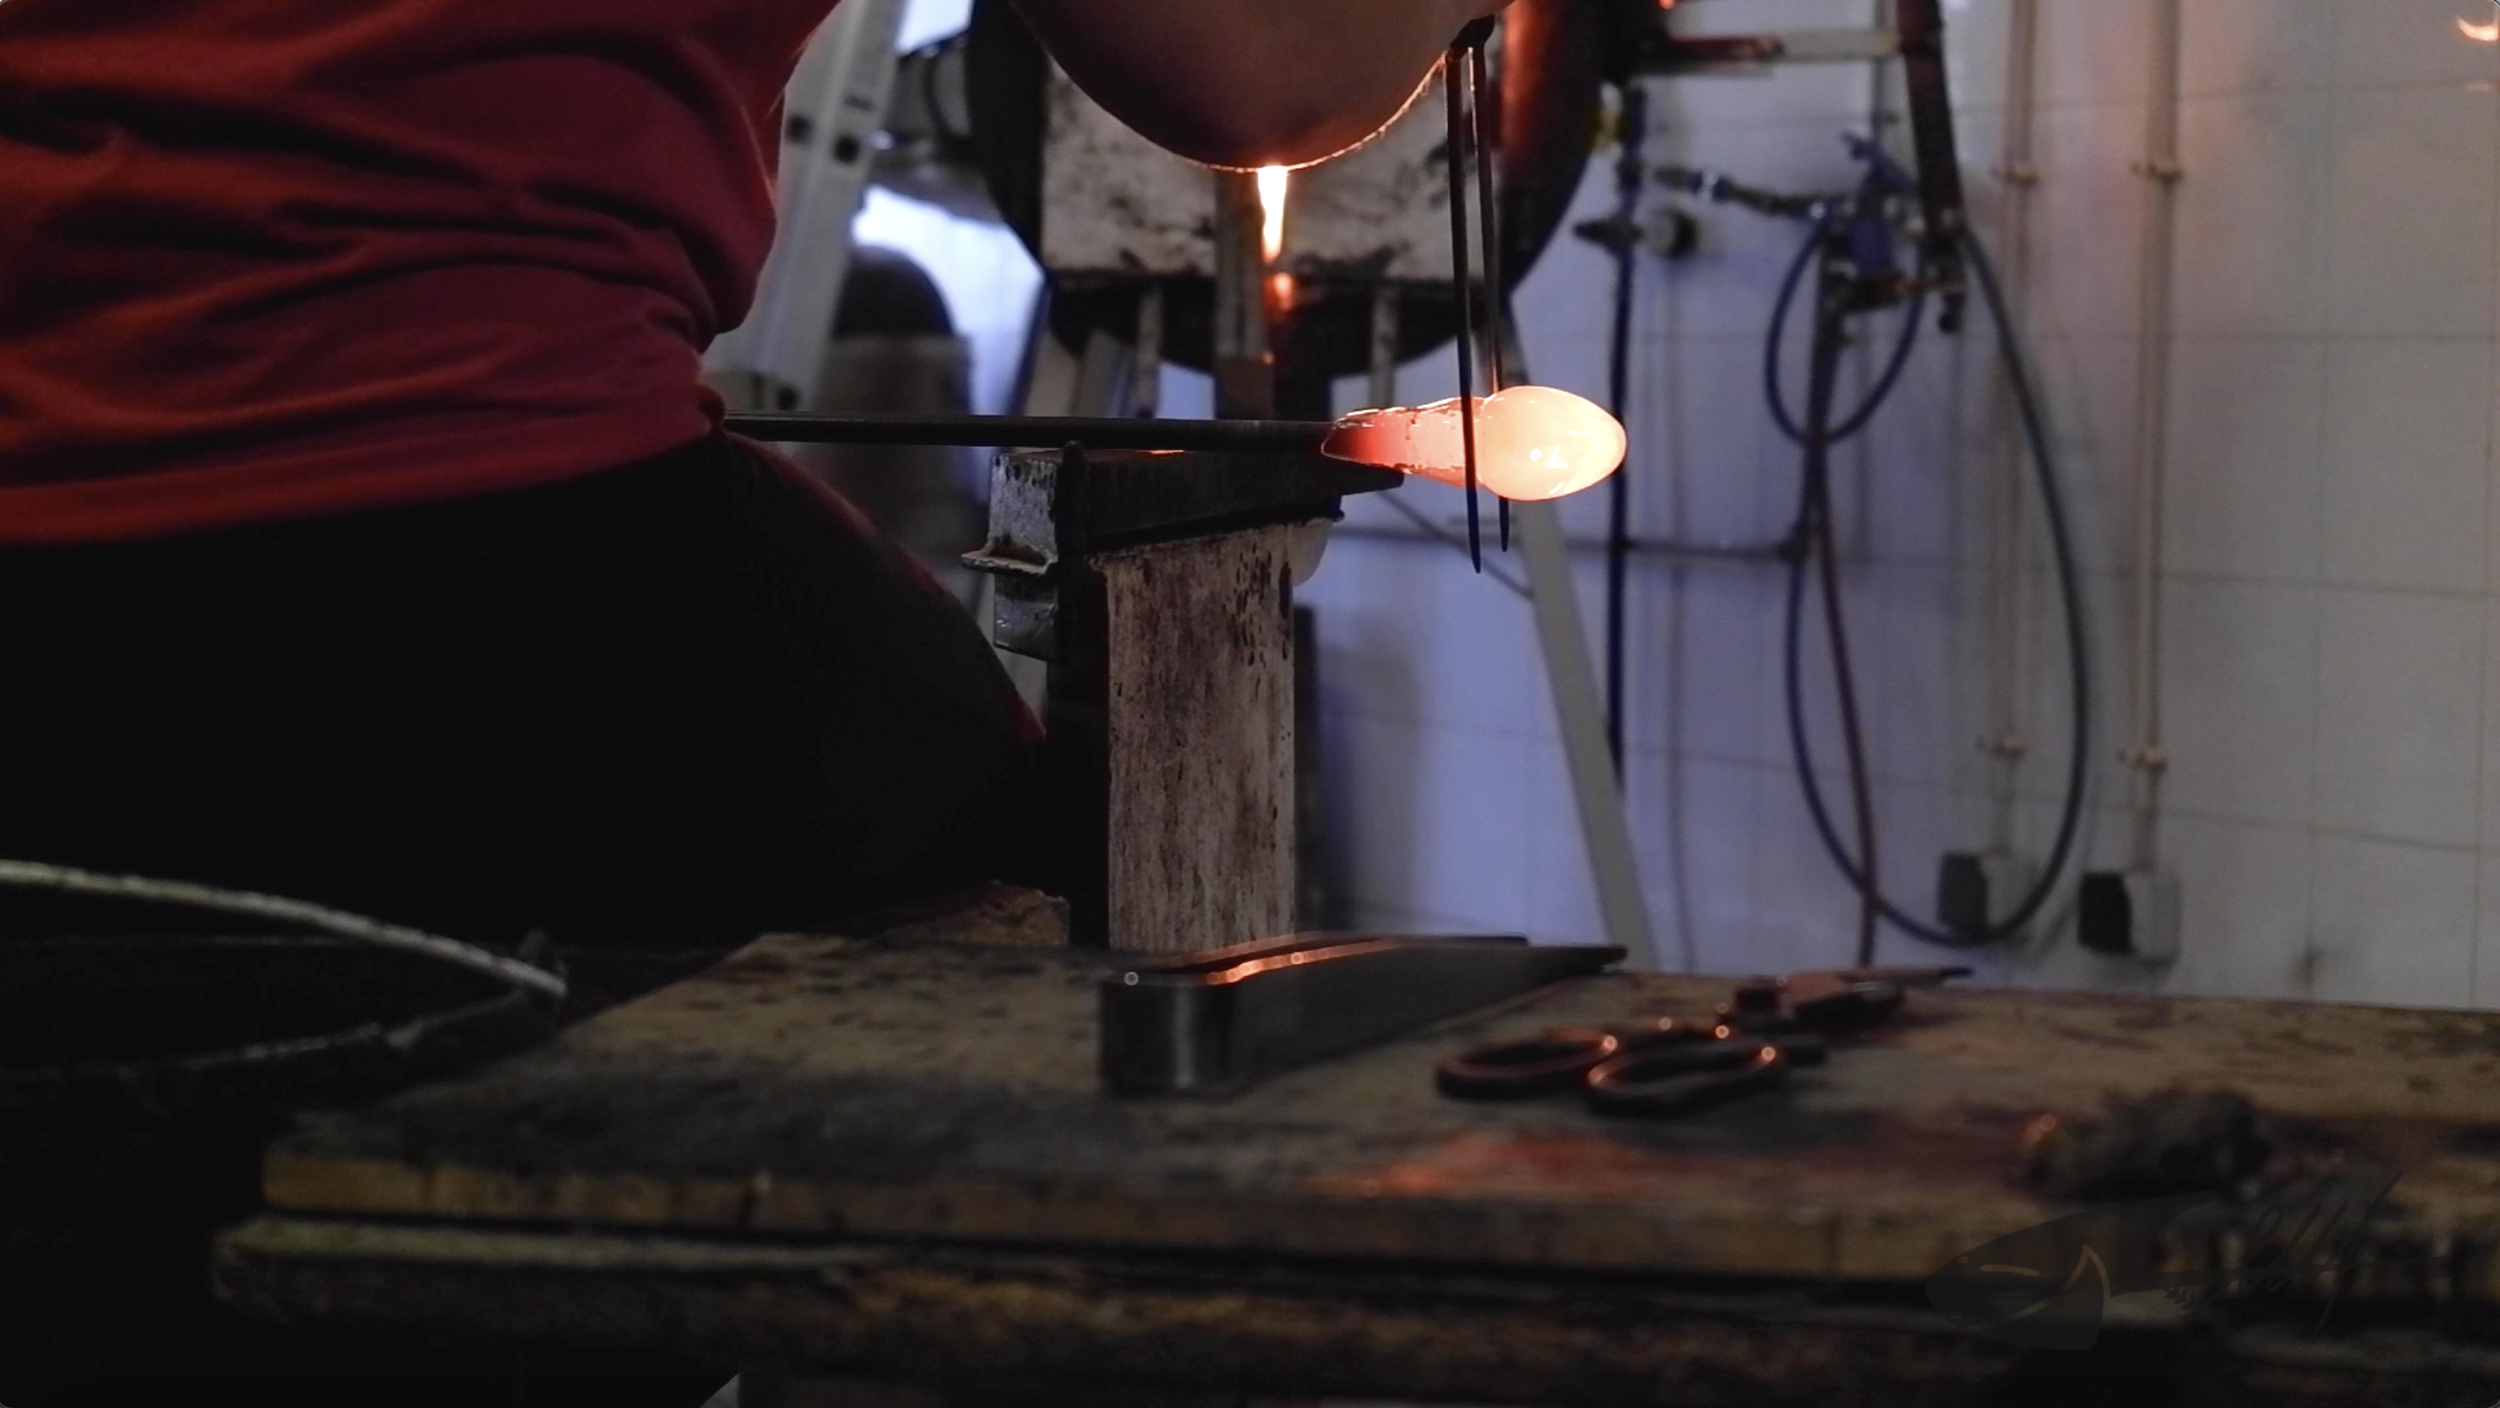
Hot Casting
There are many different ways to cast with hot glass; sand casting, slug casting, blow molding etc. This kind of hot casting involves making a solid piece of glass and dropping it in a preheated refractory mold. There are several reasons to use this method as opposed to the more common way of casting, like placing cold glass in a cold mold and bringing them up to temperature together. These are some of the reasons I chose to use this method to make the faces in my piece ‘Familial Taxonomy’. Firstly, I wasn’t planning on cold working my pieces, so I needed to put a very specific amount of glass in the molds, so there would be very little overflow. Secondly, I wanted the pieces to be as clear as possible. When you put multiple pieces of glass into a single mold, there are small bubbles that form in between the pieces, taking away clarity. Large casting glass pieces can be expensive, and I couldn’t find any big enough to completely fill my molds. They also come in all sorts of shapes, so even if I found the right size, it was unlikely to fit in my mold. With this method I could make one single piece of glass the exact shape needed to fit in the molds. Lastly, cost was a big factor. At the time I was in school and had full access to as much glass I needed in the hotshop. I did receive a grant to complete this project, but it was not enough to cover the high cost of large billets (solid pieces of casting glass).